Zoho-Creating user mail
CREATING ZOHO USER EMAIL:
Creating New user email:
1.Go to Google ,search Cloudflar Login.
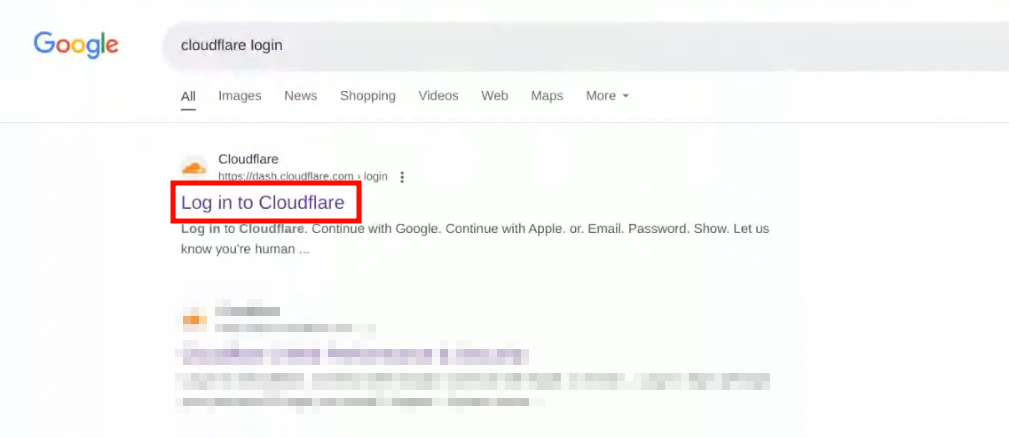
2.if you the page means you have many domain ,if you want to add domain please refer the Kb.
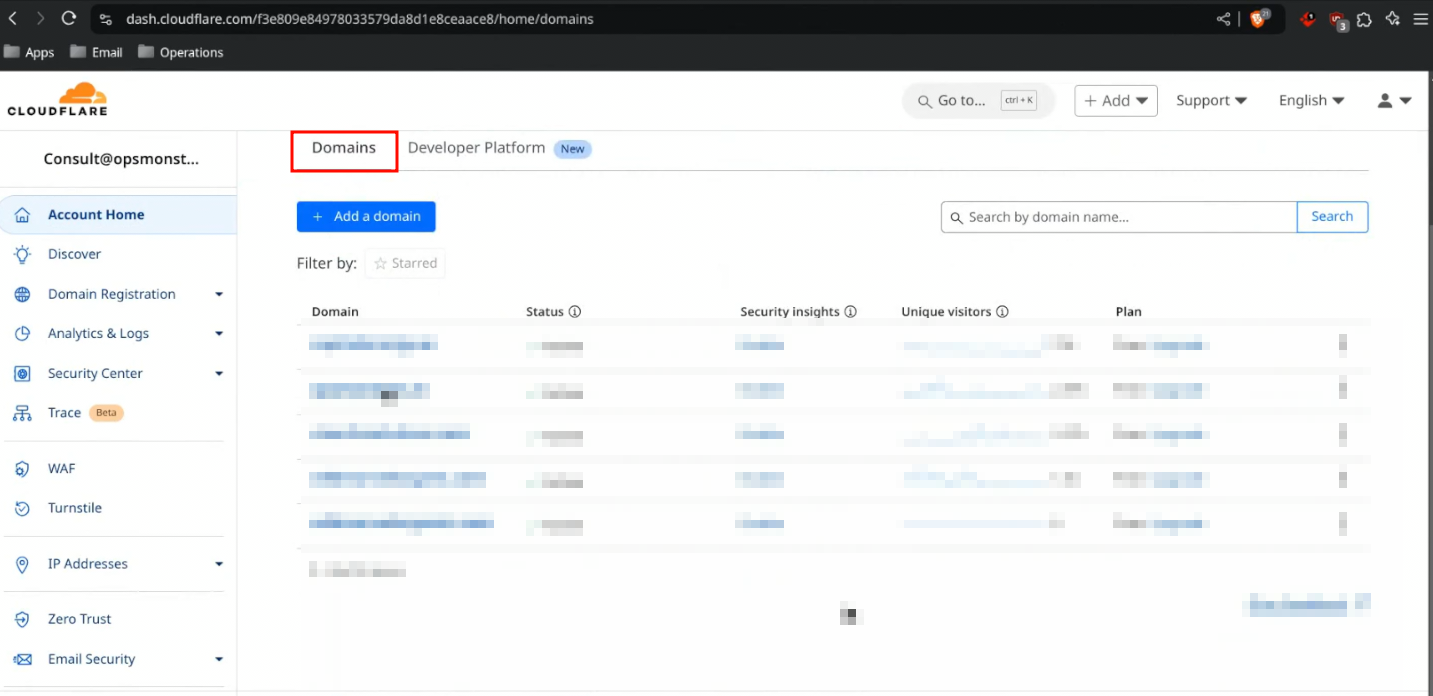
Here,refer the below image for Domain
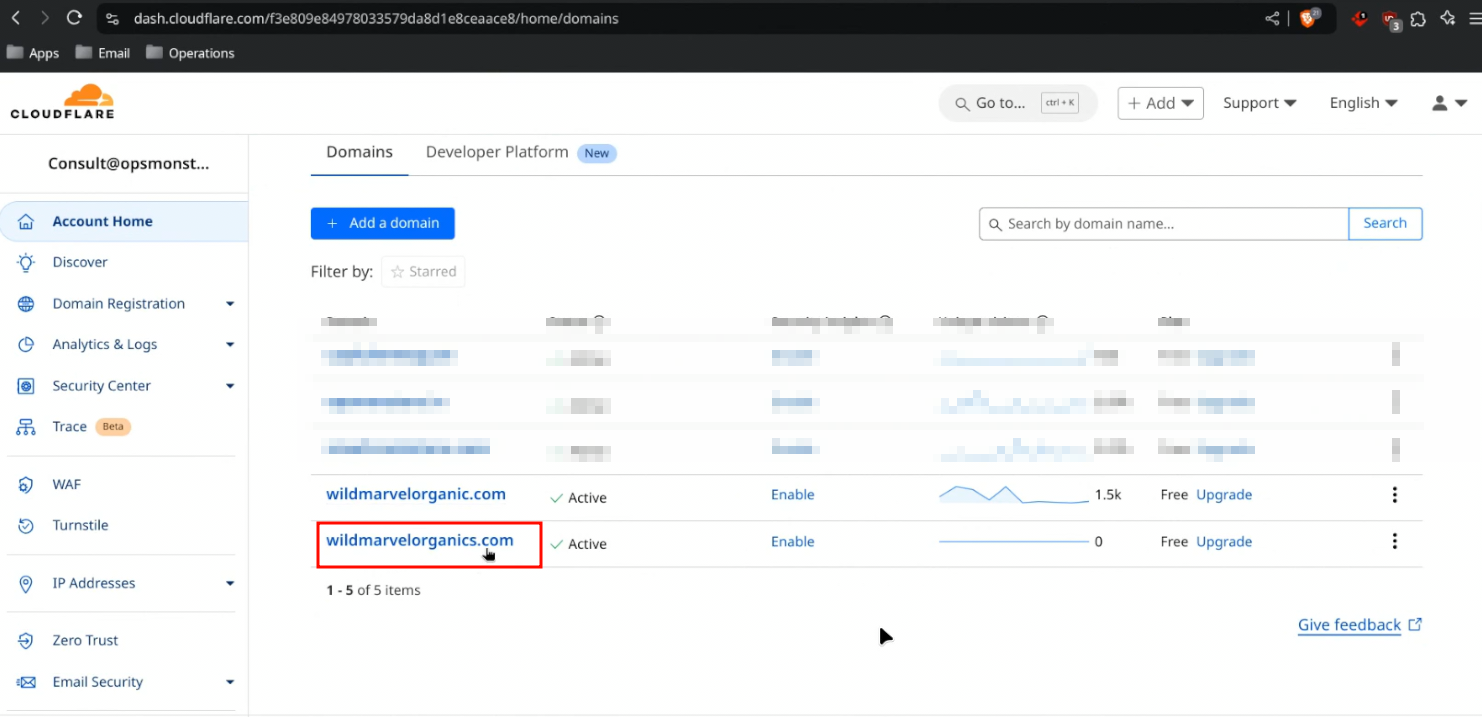
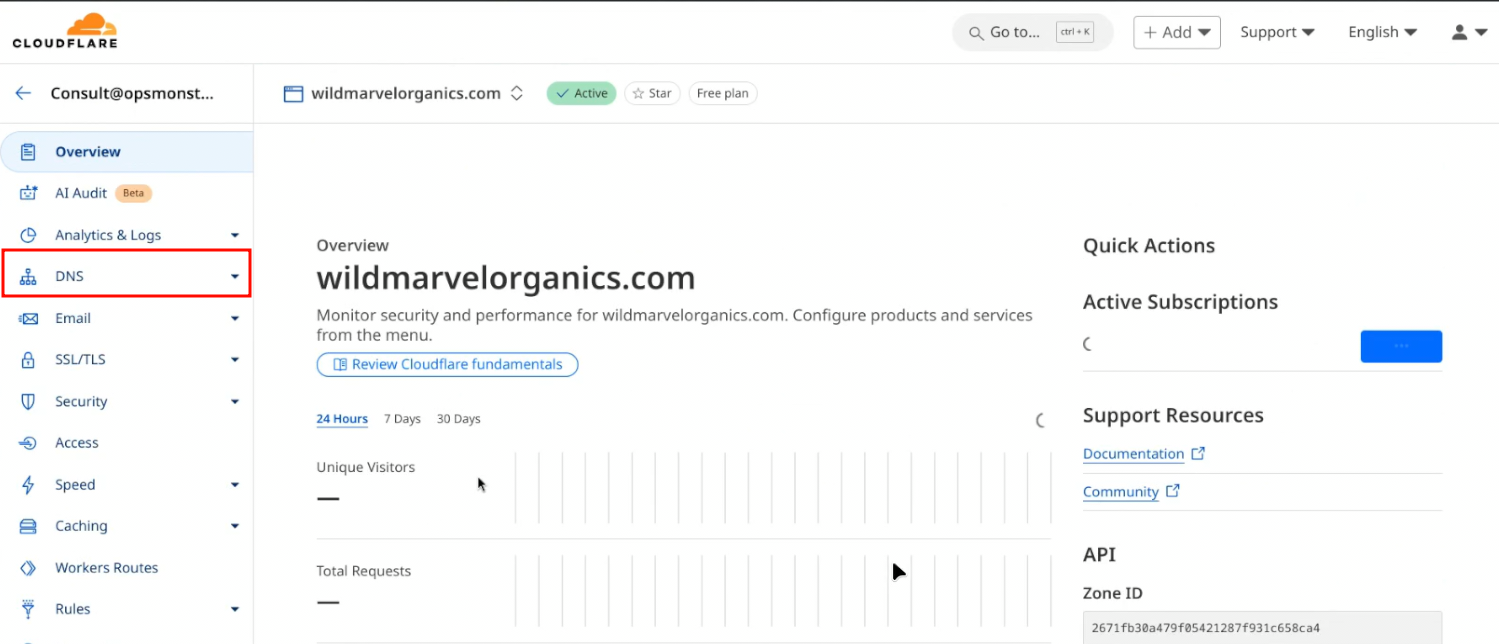
if you click wildmarvelorganics.com it will show the below image,after that click the DNS . Now it will not show any DNS.
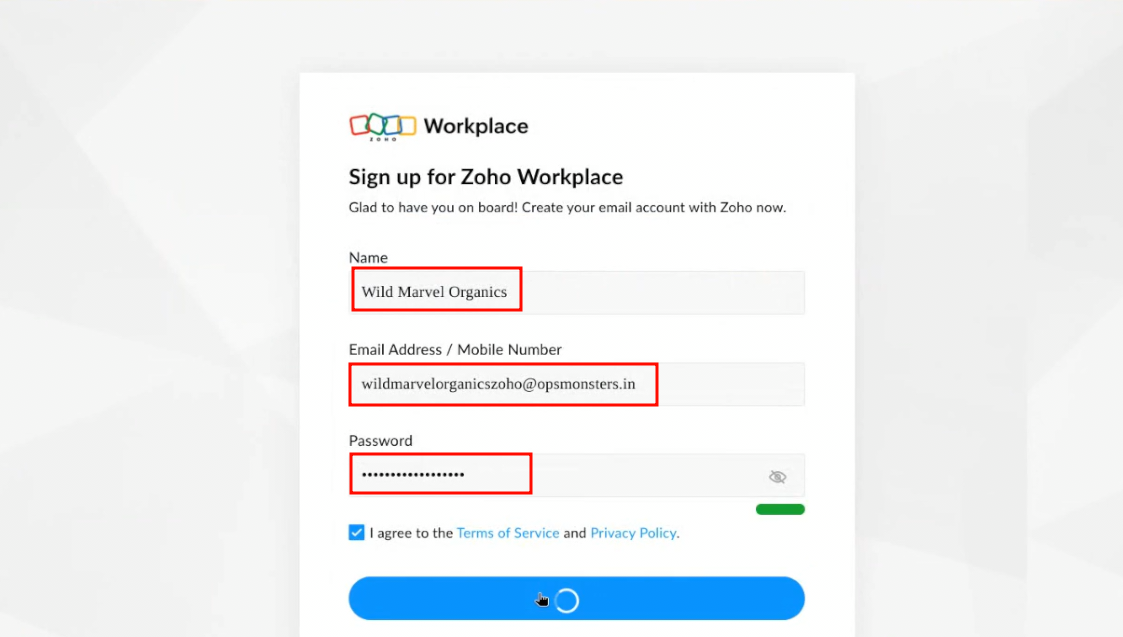
Go to zoho free email
https://workplace.zoho.com/signup
full the Name,Email address,Password and sign up .It will verify the sign-up page and enter the OTP .
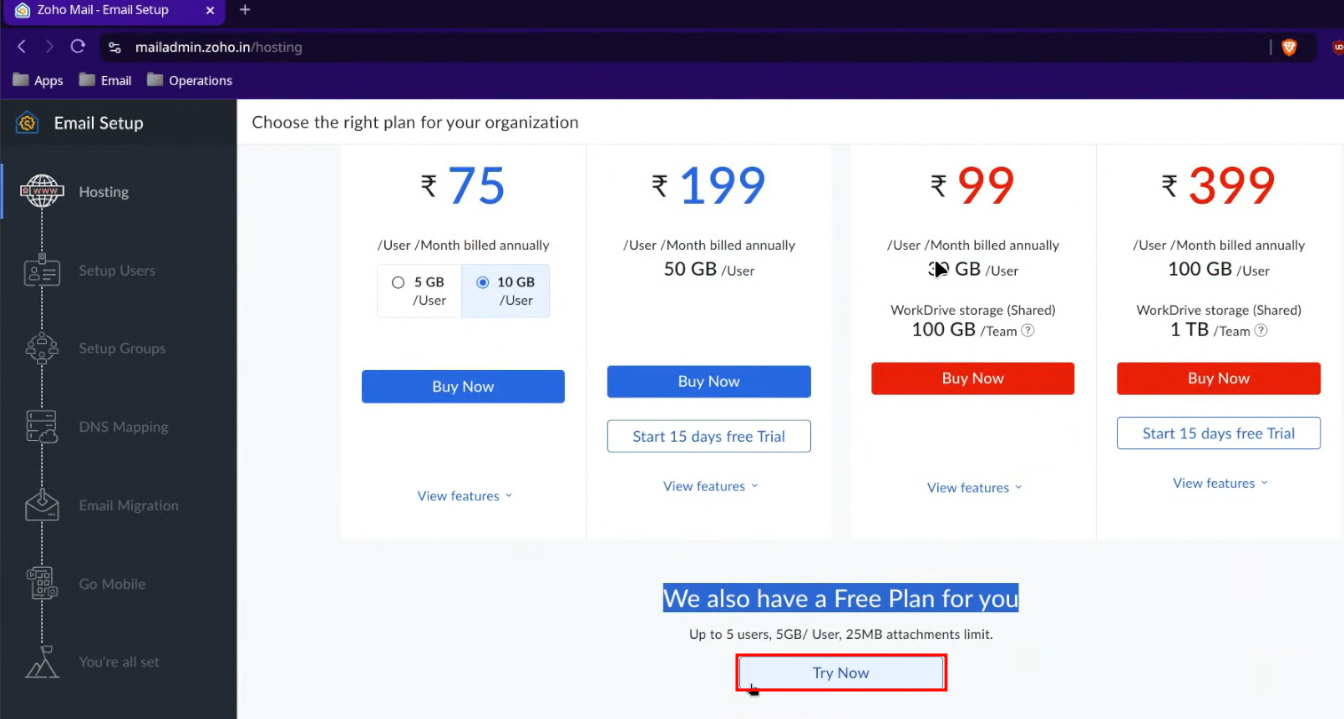
after the verification it will show the below images .Click the Try Now.
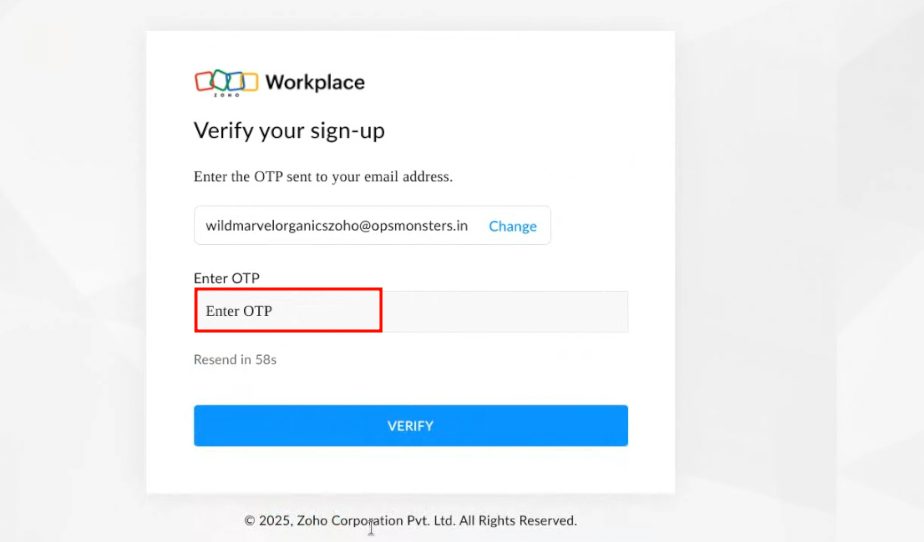
After enter the OTP it will show the below page.
In the bottom of the page free plan is ther after that click it Try now.
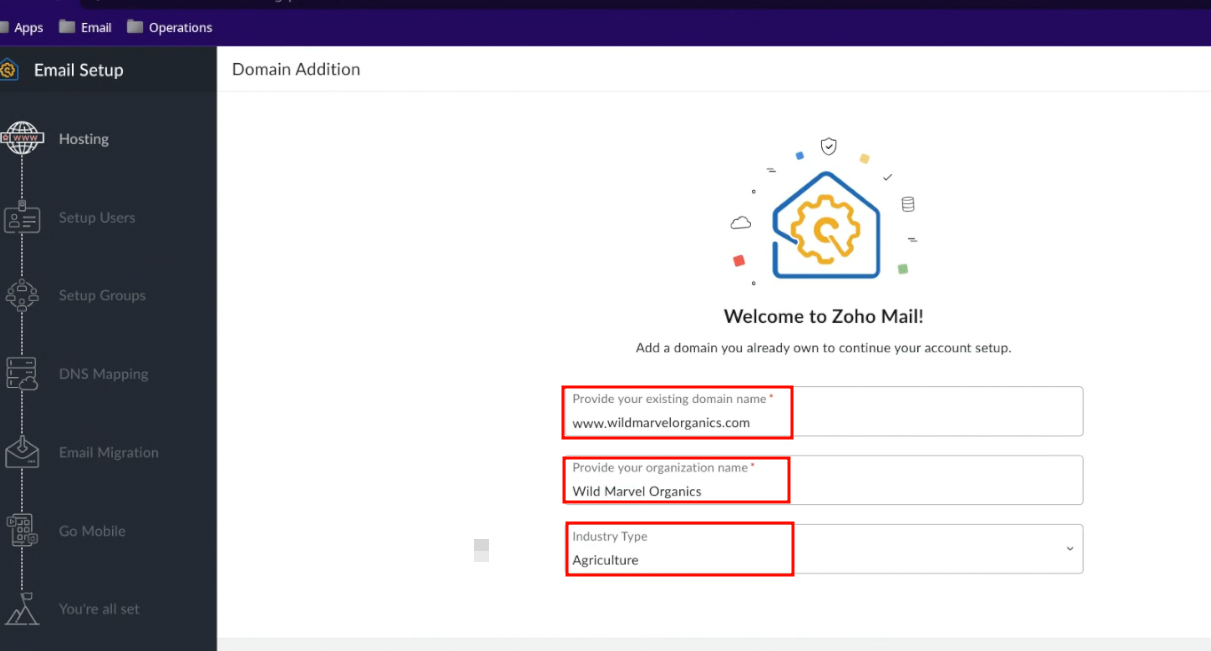
if you have already domain means Add now.
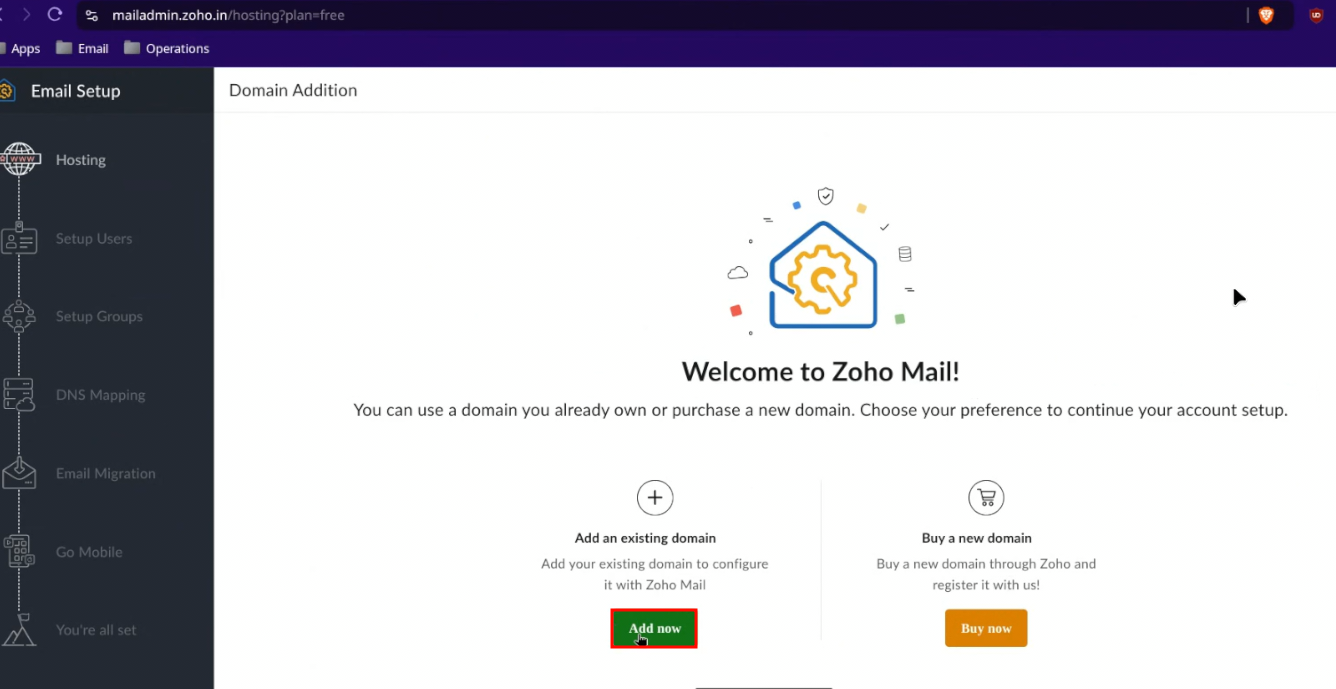
Enter your existing domine name,organization name and Industry type.
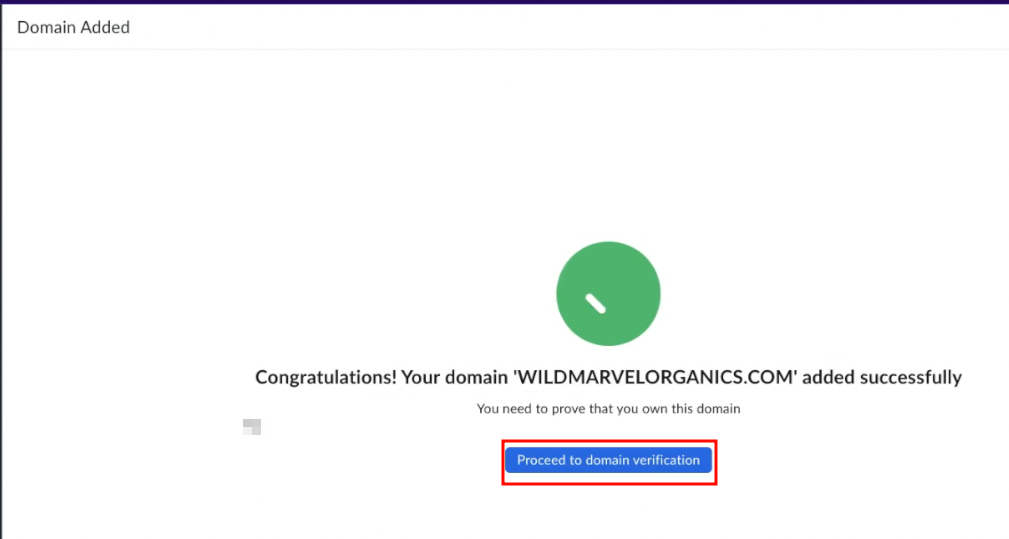
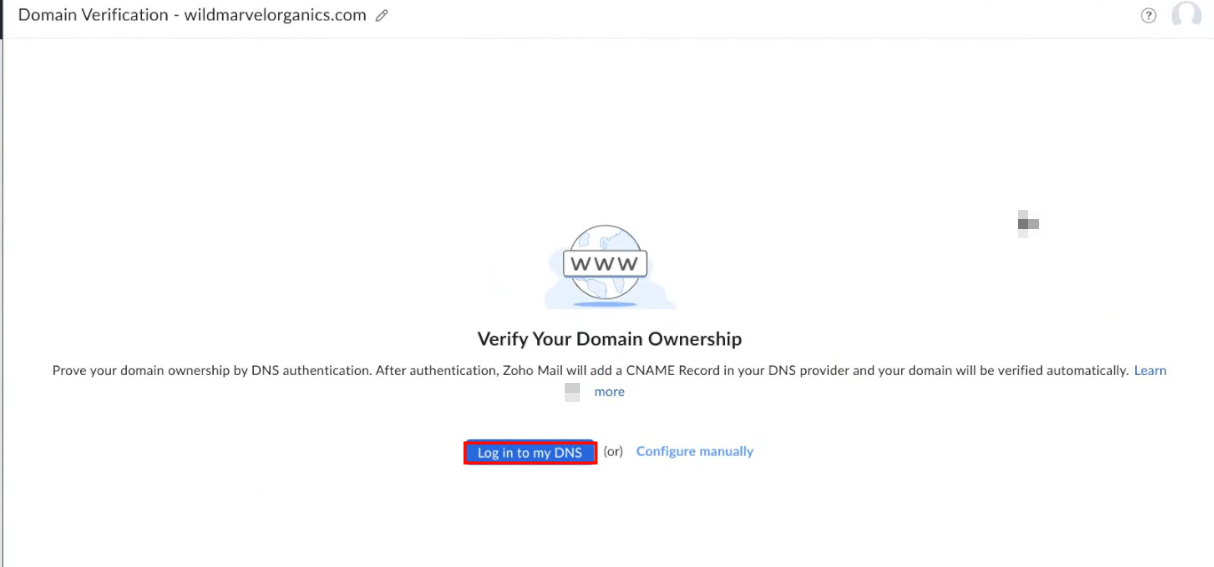
Here,we need to verify the Domain
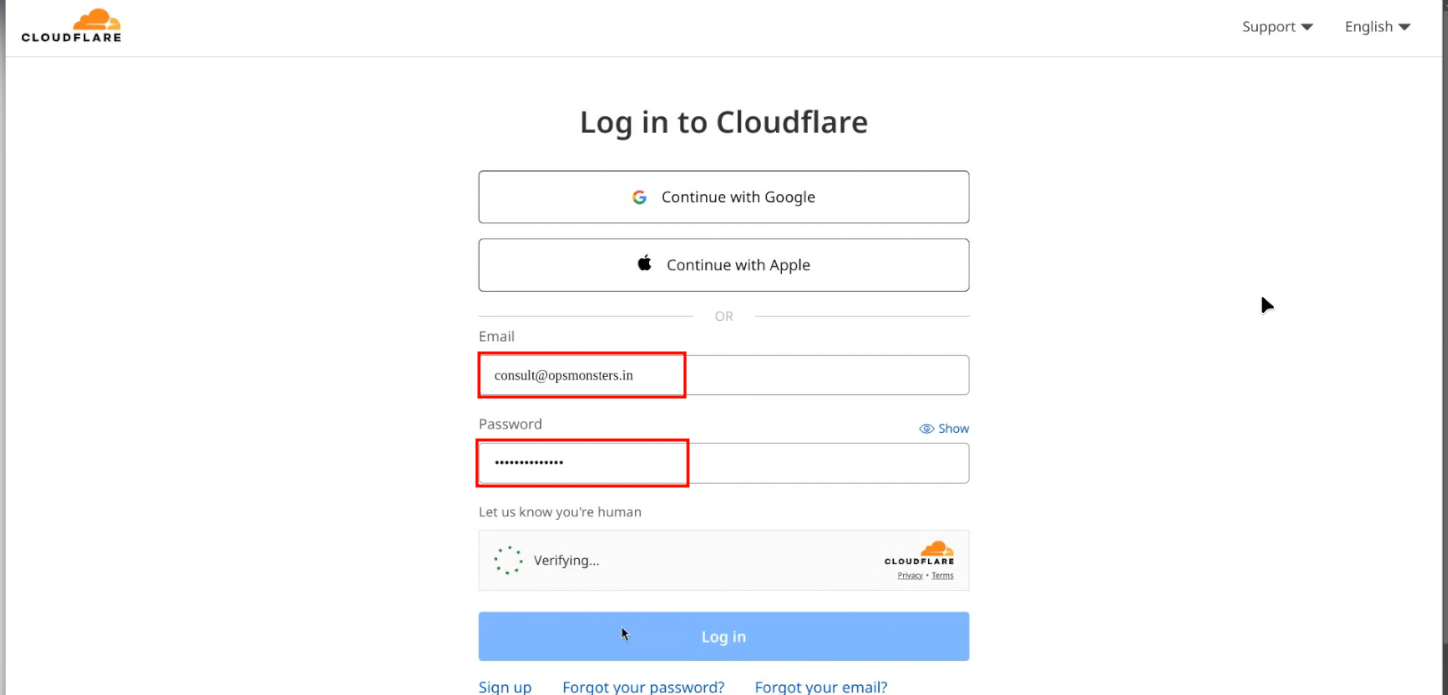
Two option is there choose login to my DNS because we have cloudflar server.
login for Cloudflare
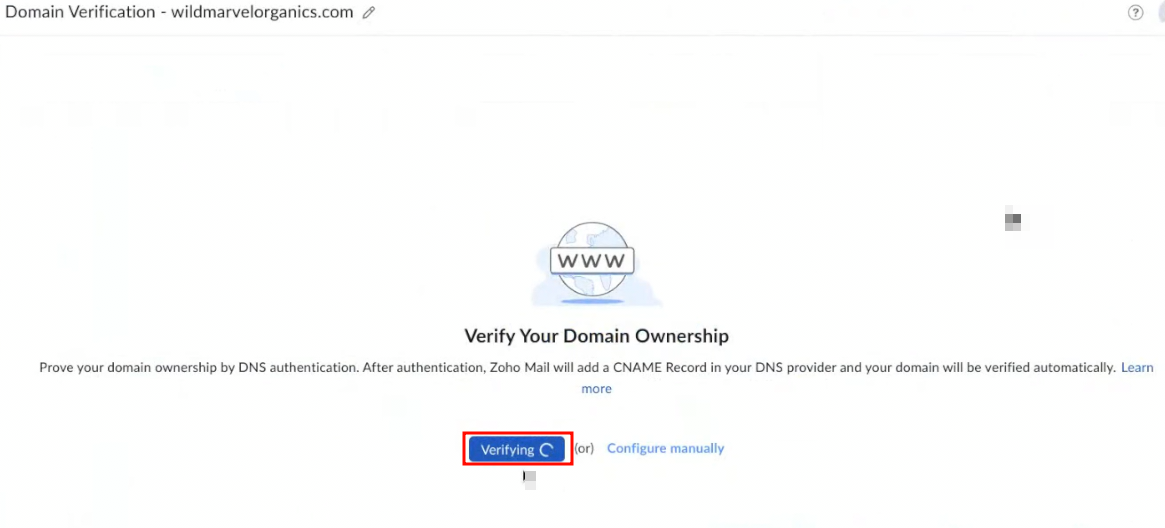
After that it will show the verify page,it will take too time.
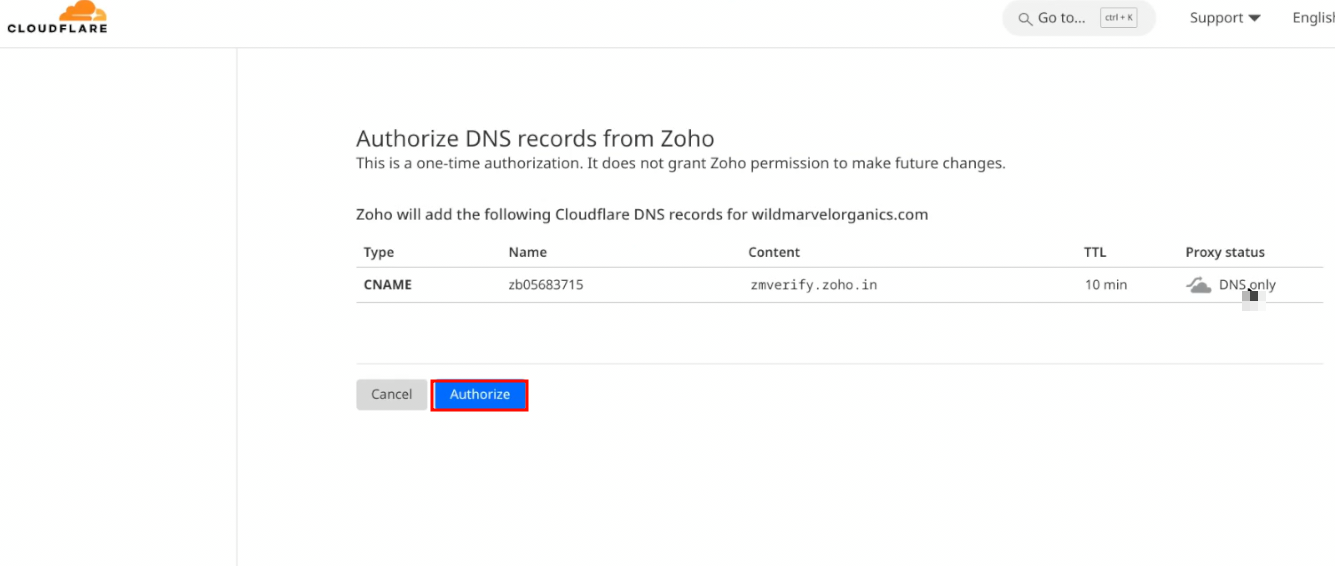
if we refresh the cloudflare means CNAME will be there.

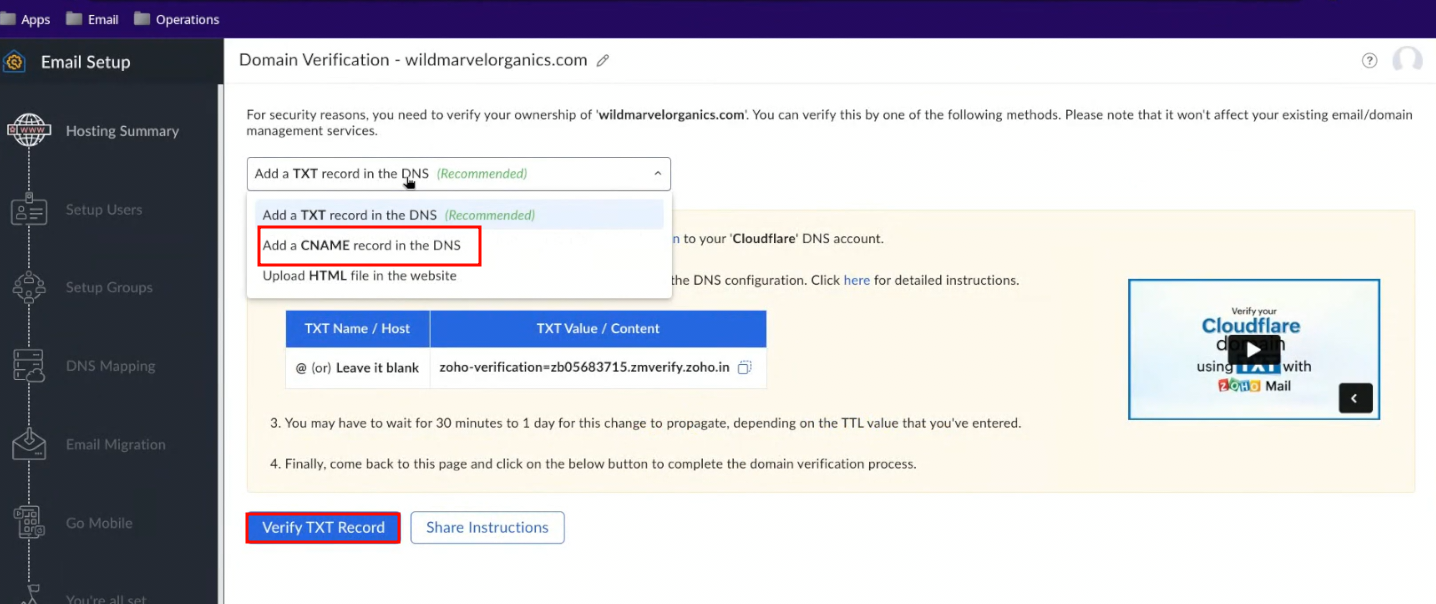
Domain verification to flow the below image.Add CName and verify TXT Record.
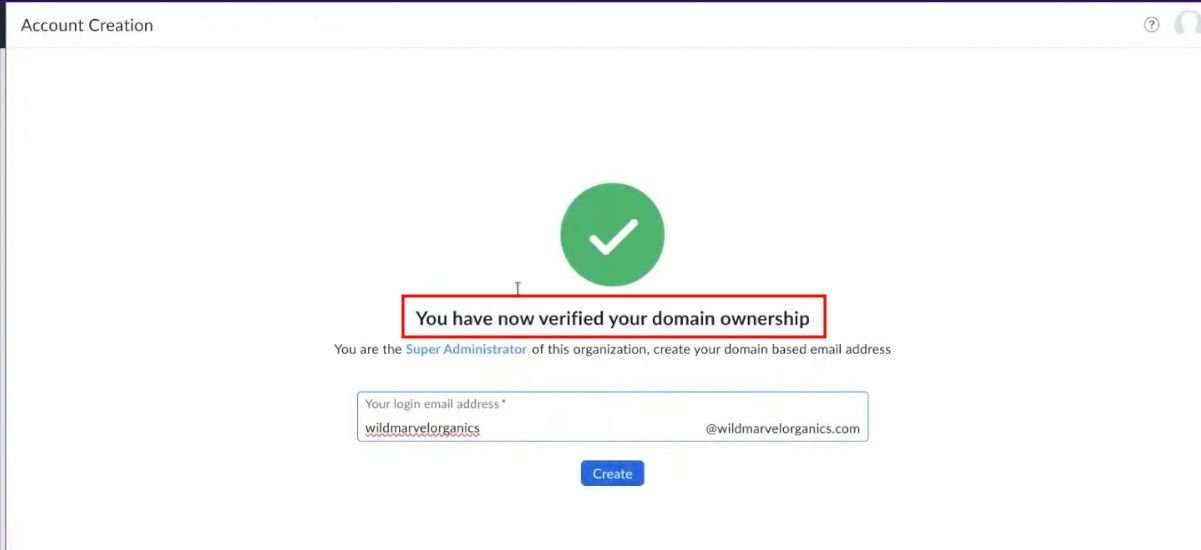
verified successfully.
- Add email for login.
if it created means it will go to new email.
go to notification click the view MX configuration detail link.

Here Domian is verified but MX is not pointed so click that yet to point MX Record.
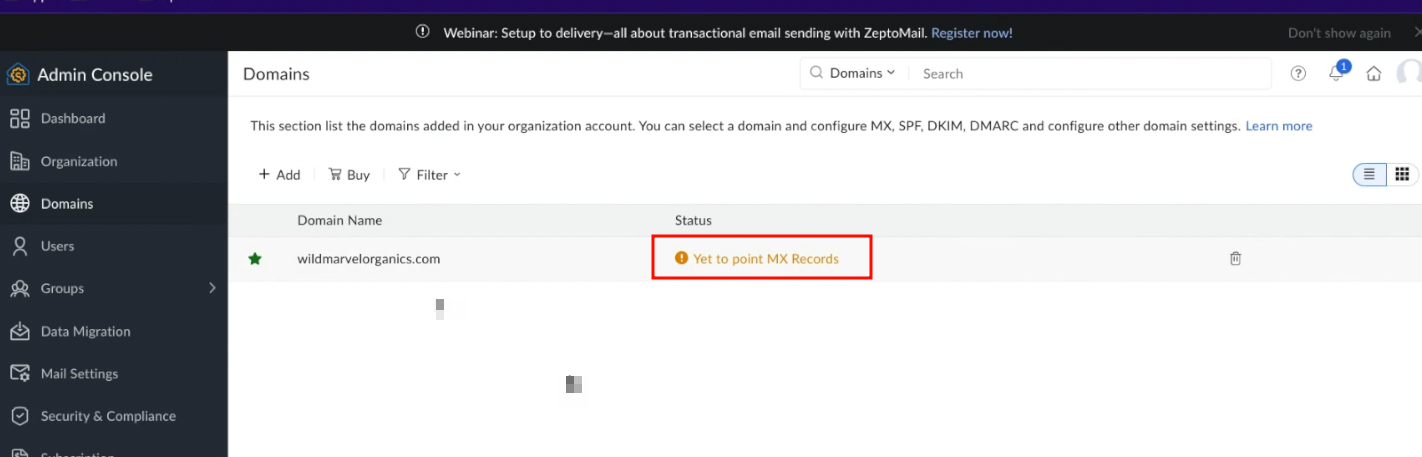
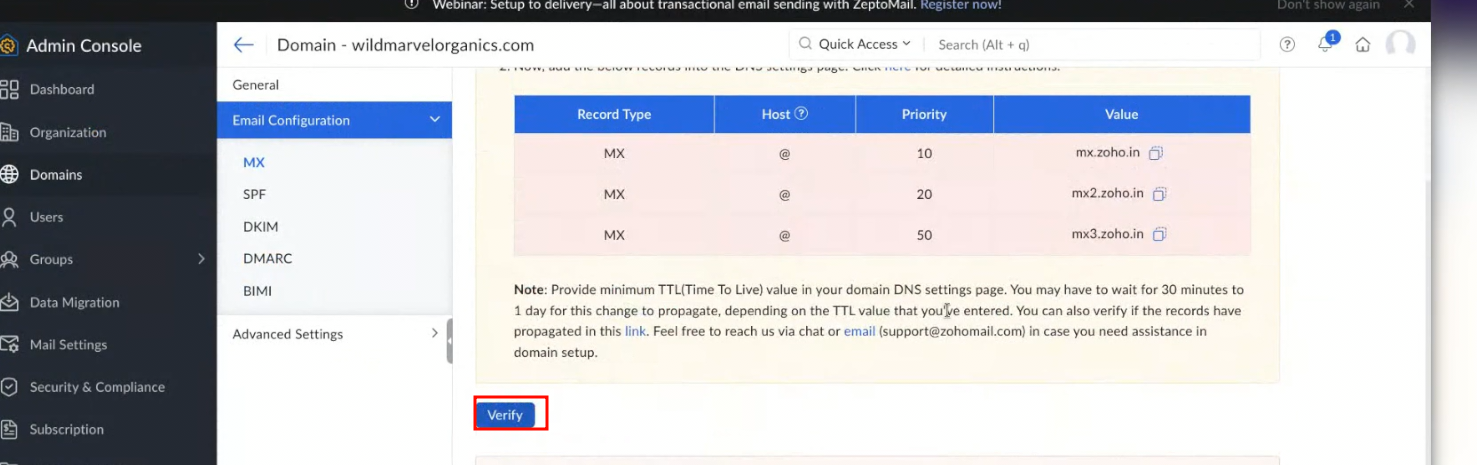
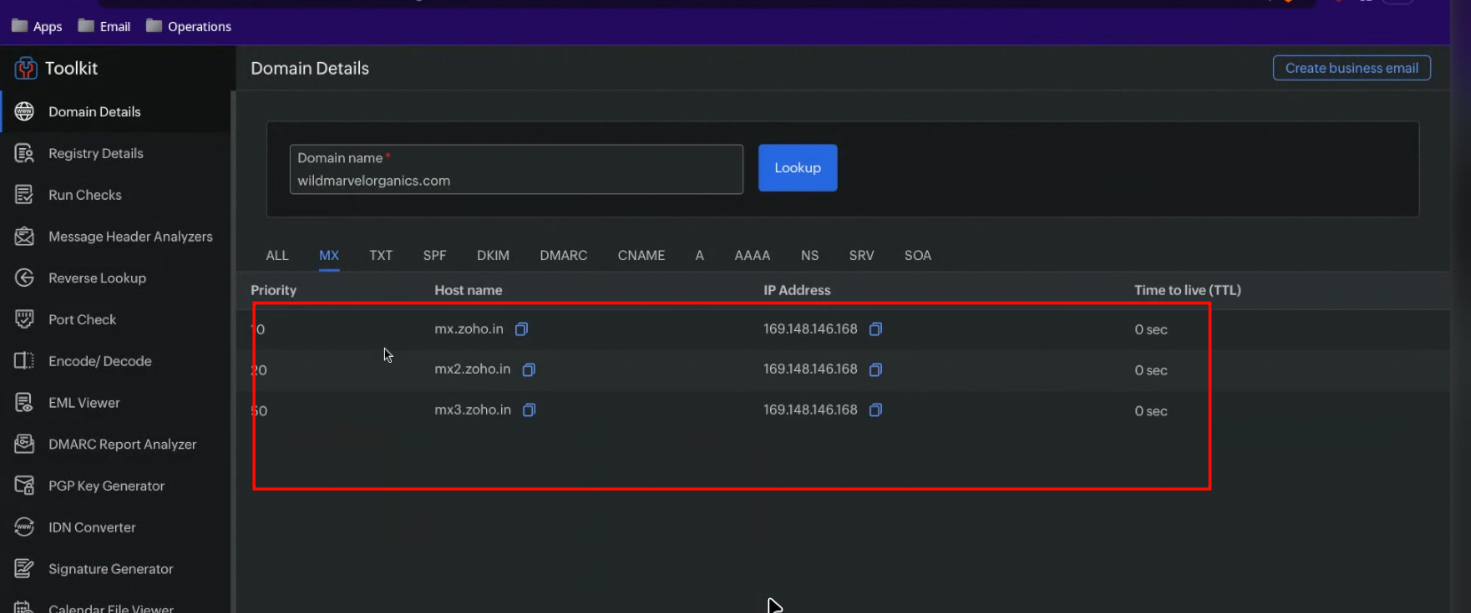
The Link will show all the MX details.
- Add all MX details into cloud flour.
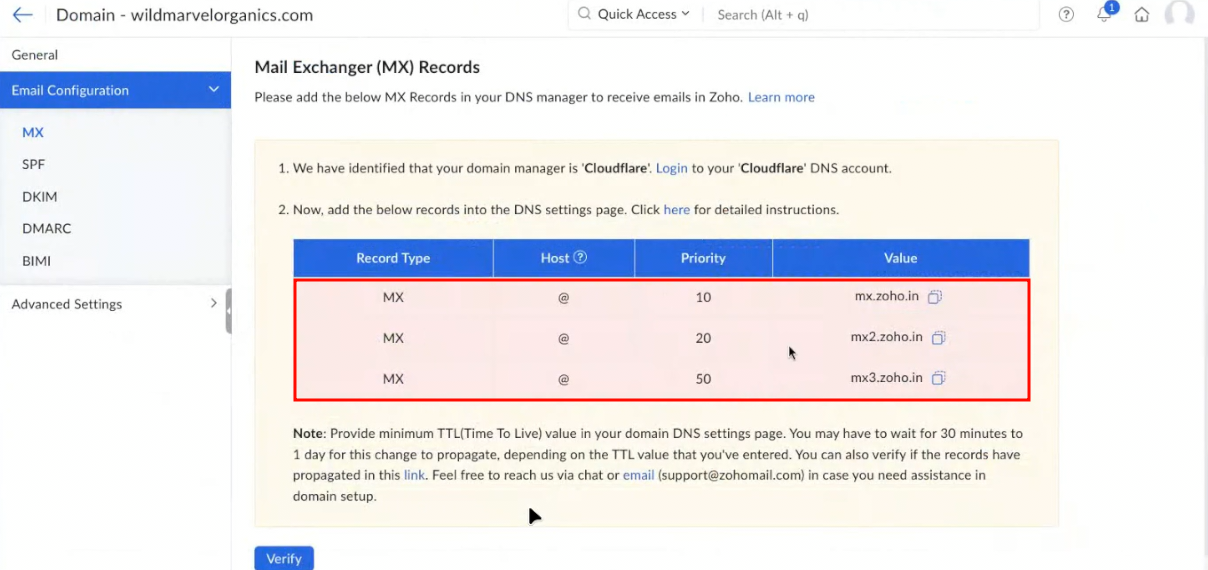
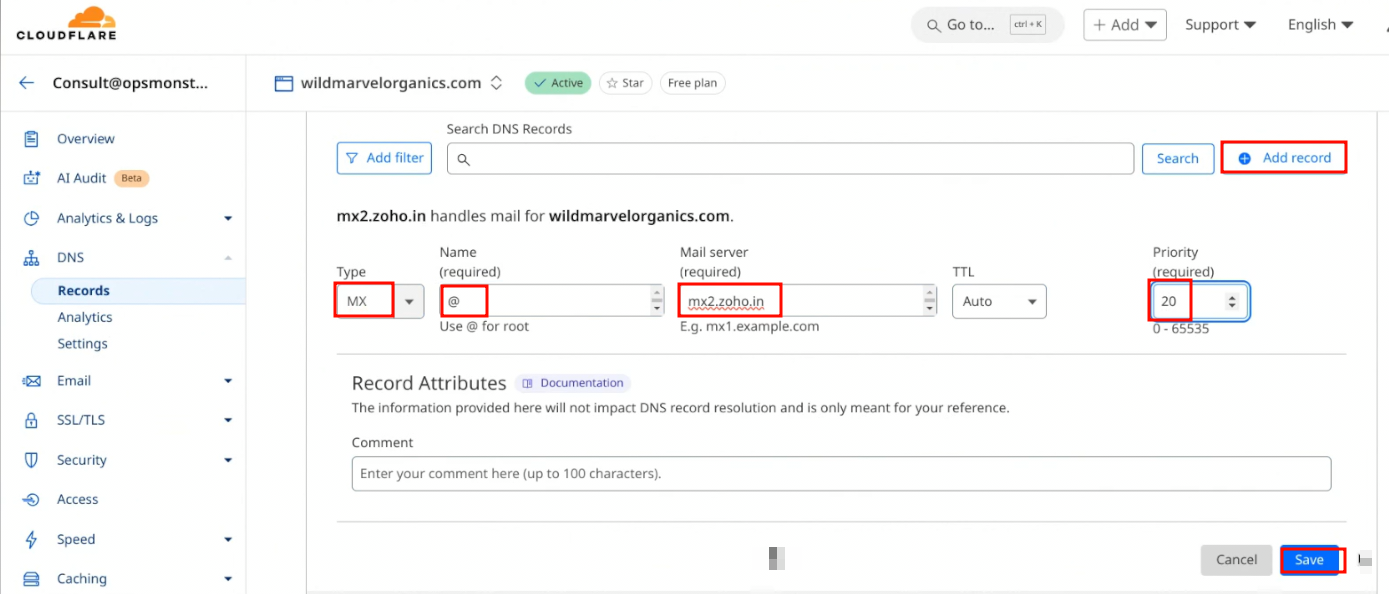
Go to cloudflare add recored type,host,priority,value and add.
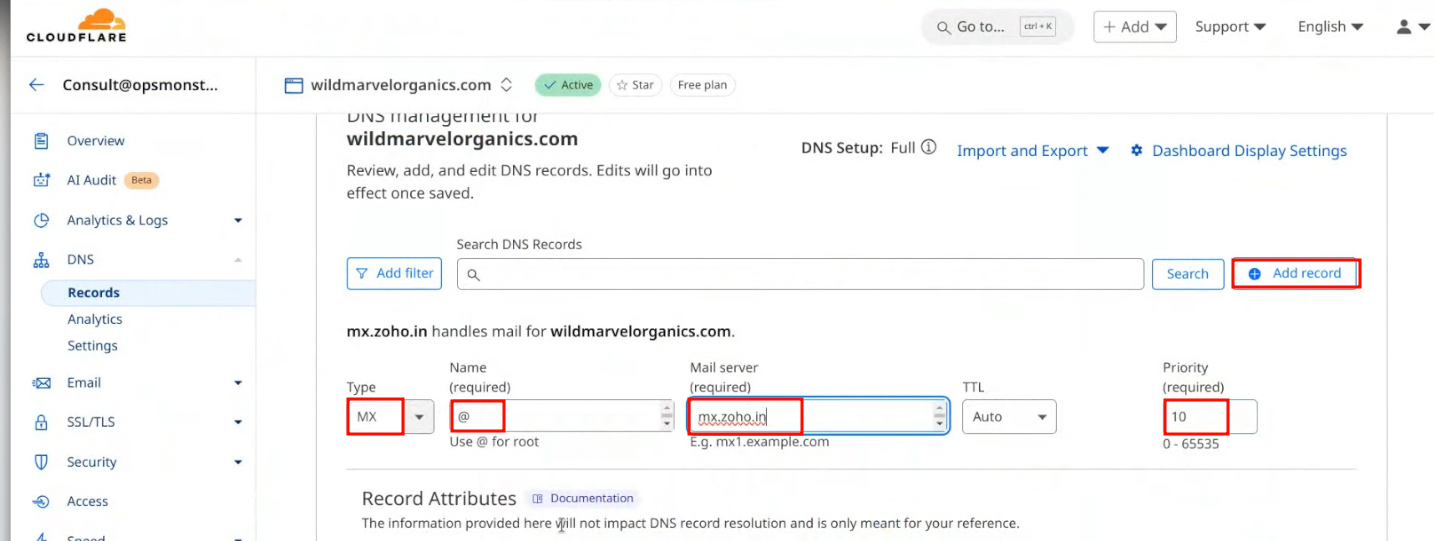
Here change the type,priority,value.
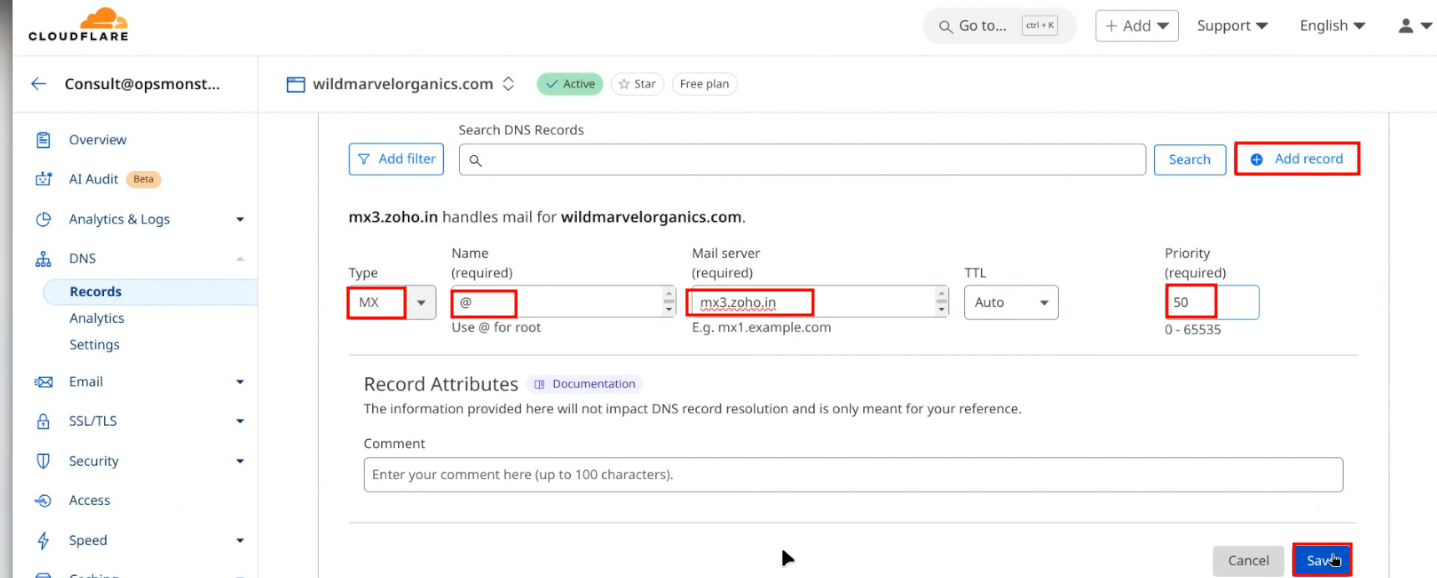
Here cahnge the type,priority,value and verify.
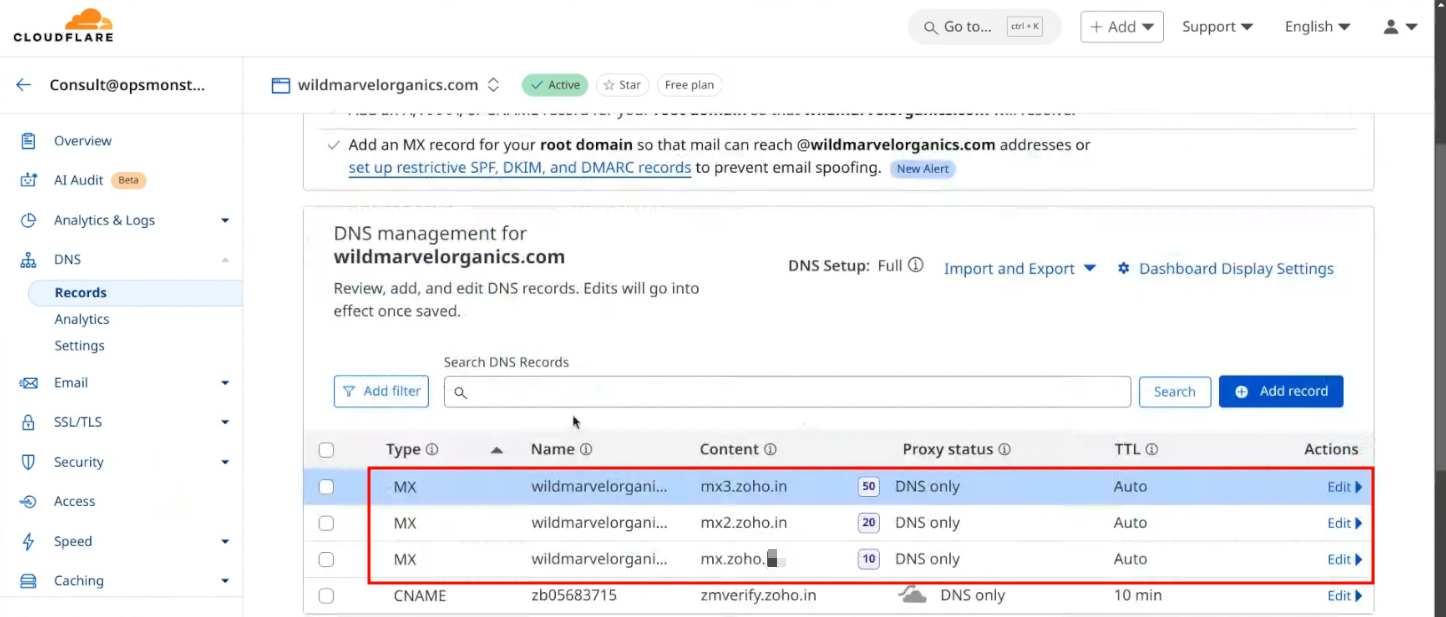
After adding the MX details below image if you want to check,the final value will be added in below image.
After verify it will take more time(maybe one day also).
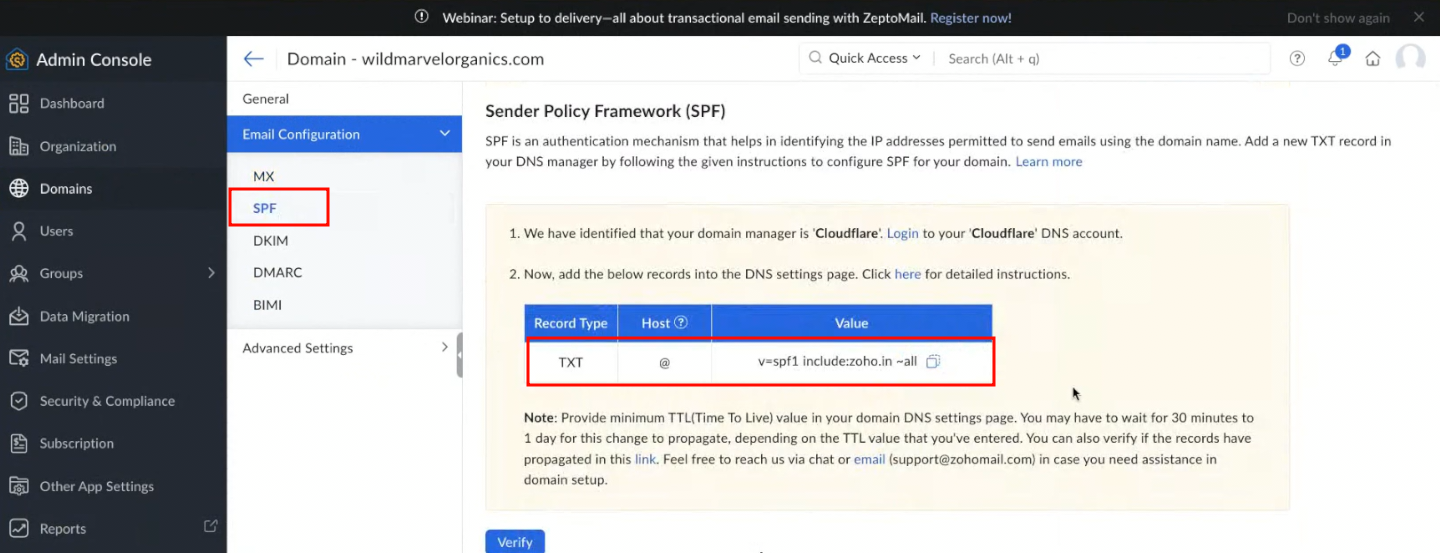
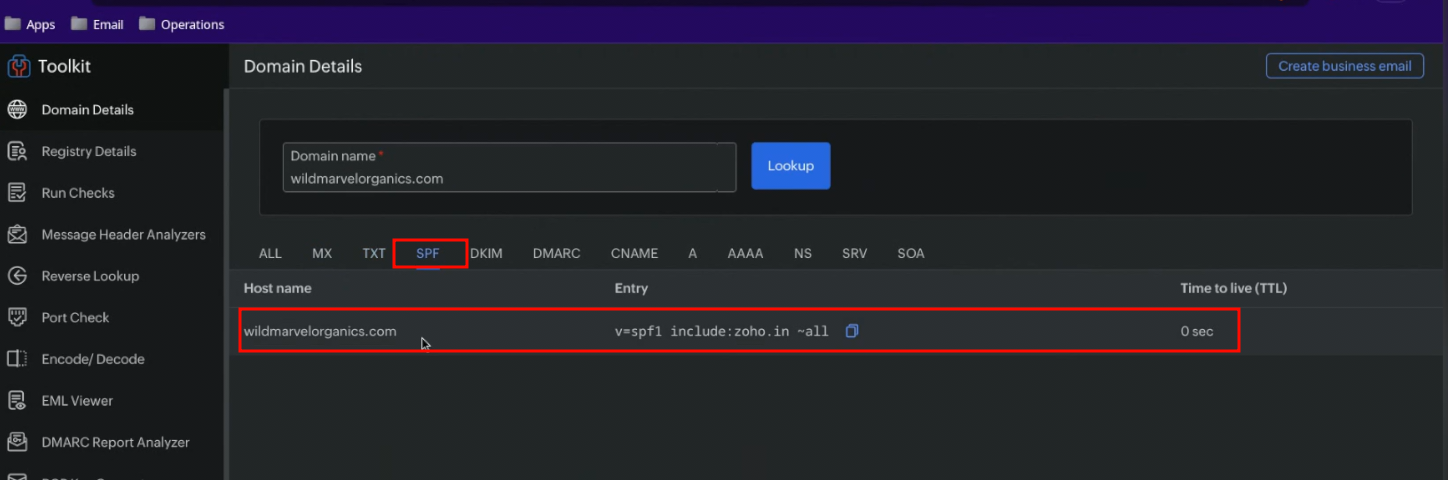
SPF RECORD
Copy this below code and add into cloudflour.
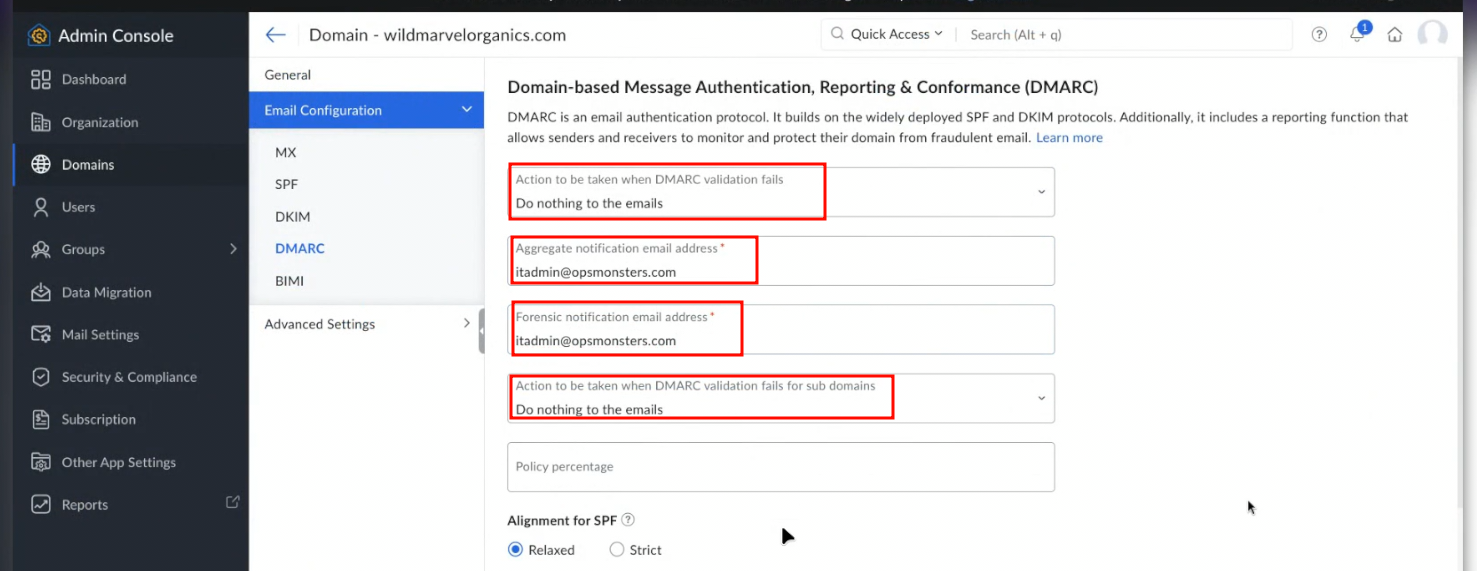
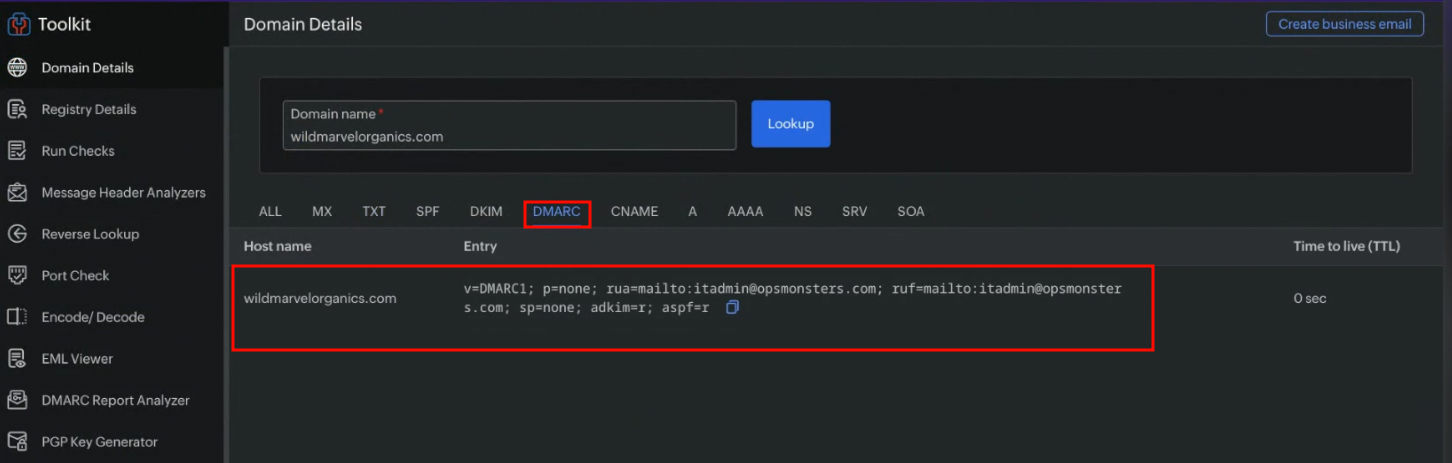
DMARC RECORD:
Enter the below code.
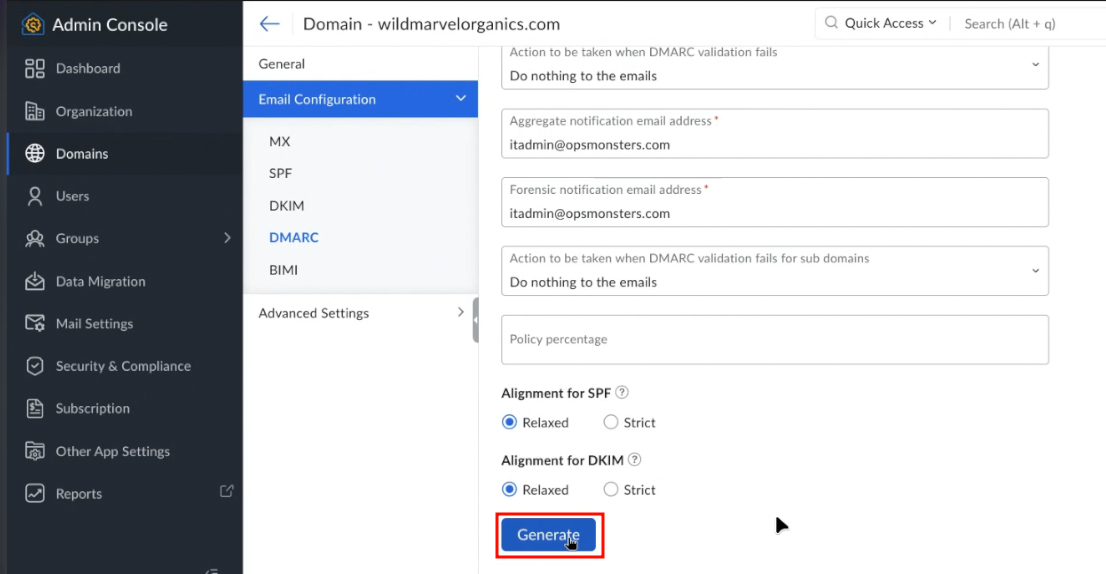
After that Generate .
Copy this TXT name,host,value.
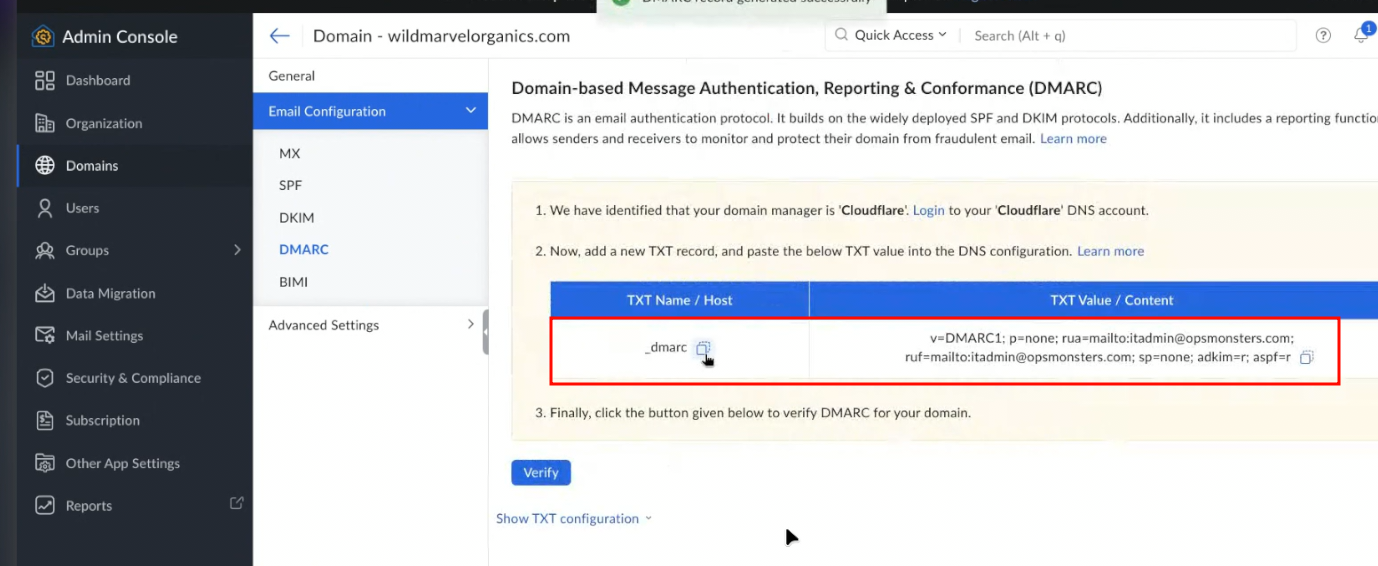
Enter all the values in cloudflour.
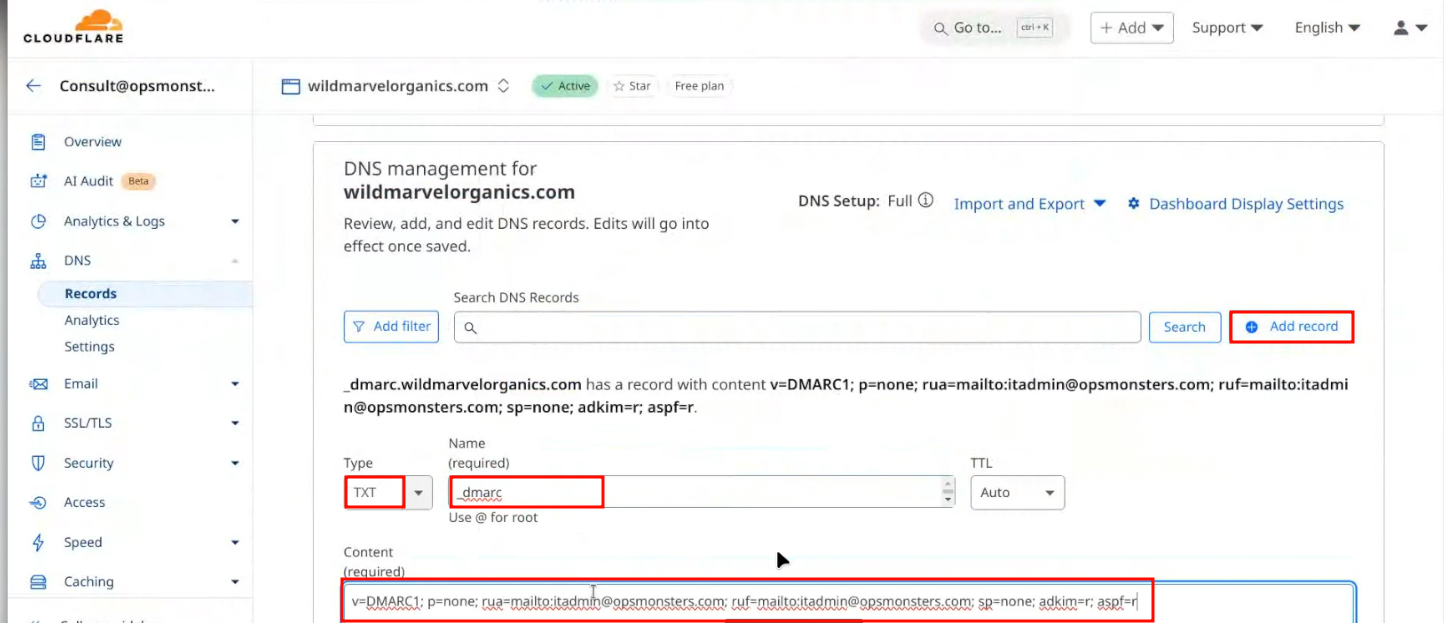
Here the record is TXT,host,value everything is added and save.
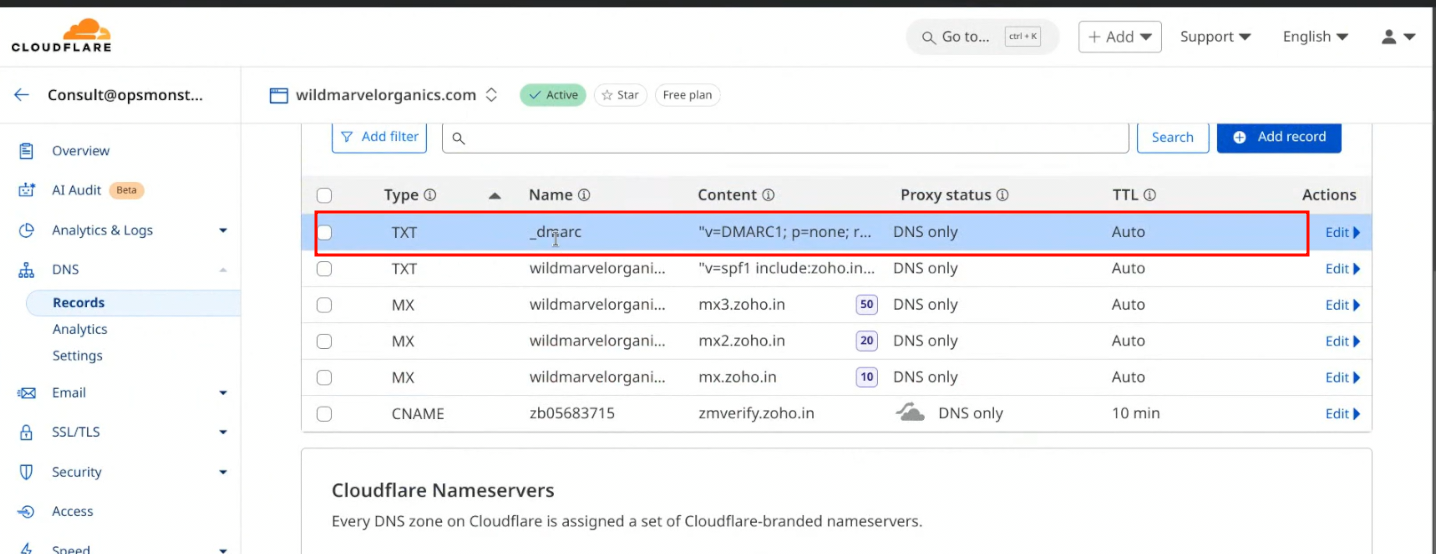
Check the Domain detail if it is added .
if you open the link it will show whatever we added in cloudflour Mx detail.
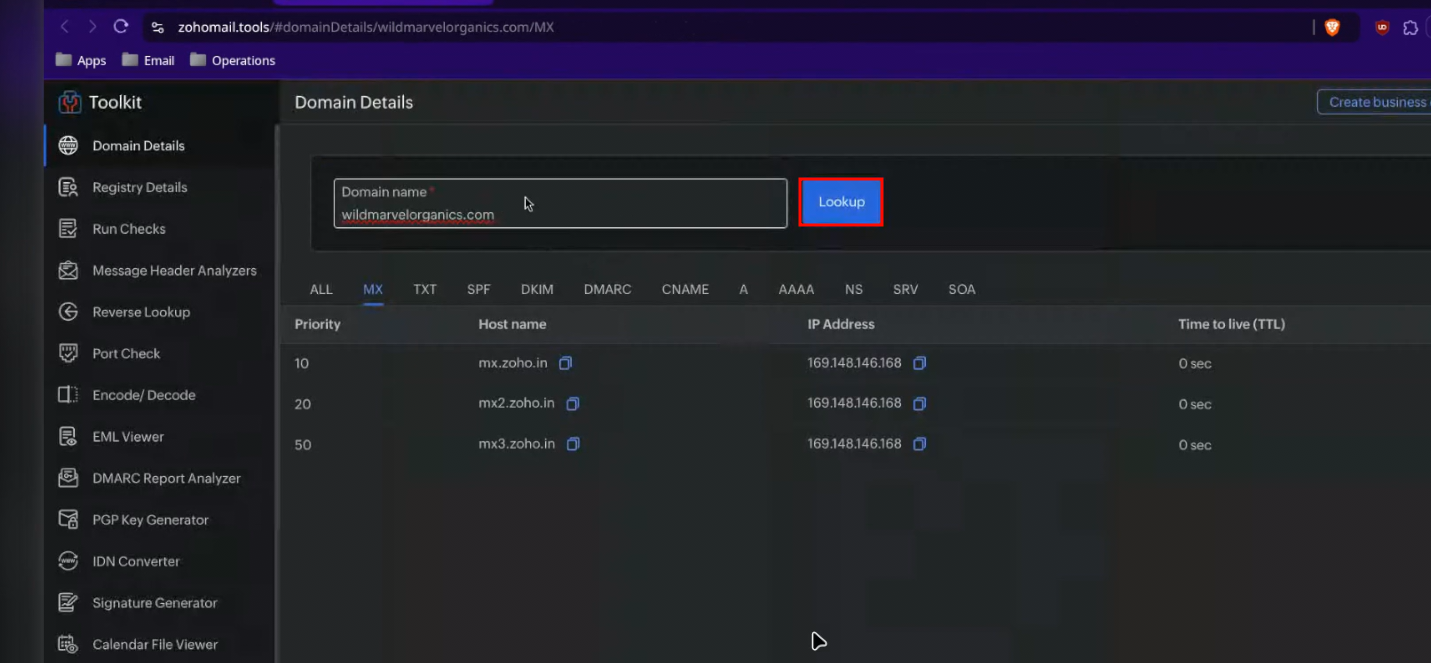
It is the image for MX Domain detail.
It is the image for TXT Domain in Mx detail.

It is the image for SPF Domain in Mx detail.
It is the image for DMARC Domain in Mx detail.
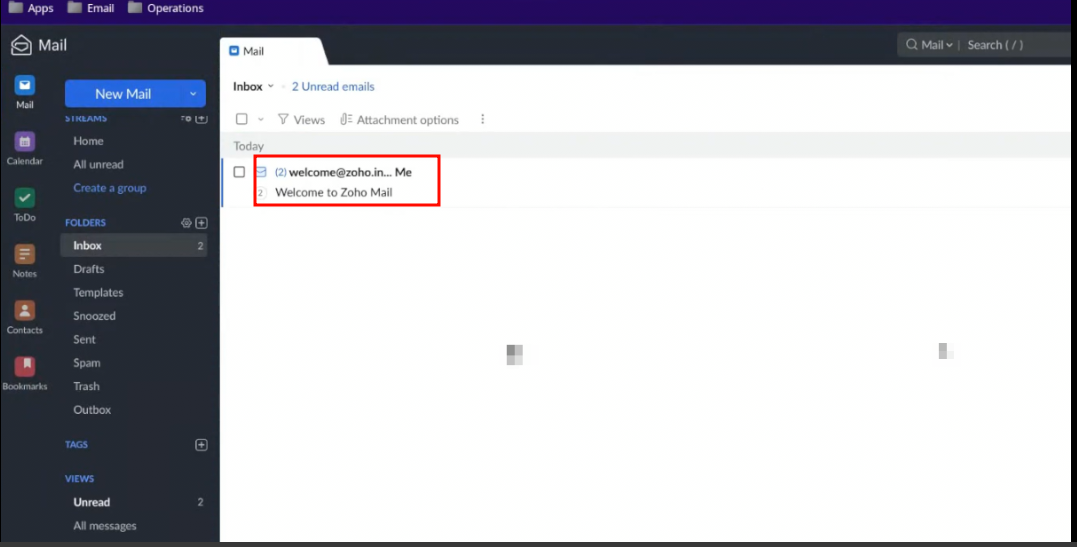
Go to zoho email.
within Half hours the email will be created.